Wednesday, December 30, 2015

LaCrosse Grange 18-inch Boots Review (Video)

LaCrosse Grange 18-inch boots
Santa brought me a new pair of mud boots for Christmas. With the wet weather and flooding we've been having lately it was a great addition to my gear. I ended up with LaCrosse Grange 18-inch boots. These boots are great for having to deal with high water around the house, fishing, farming, and even camping. While I don't recommend hiking in them, they are a great resource to keep stashed in your truck or in your RV. Nothing is worse than getting your nice pair of shoes caked in mud. So I find these a great investment.

The boots fit true to size. If you're a half-size, go up to the next full size. My 11's fit perfectly. They are tapered around the ankle which allows them to grip. It may require some push to get them on, but when you're walking in a creek or muddy muck, it's nice to know they won't slip off easily. Their nice and high and have the ability to cinch up at the tops. They have a bit of a heel to them. The tread on the bottom grips decently and doesn't seem to hold mud (at least not for me yet). These are not insulated, so if you're going to be in the cold you may want to look for another boot or wear thick socks. All in all they're a good mud boot and I'm happy with my purchase.

See my video review below to see them in action.

Wednesday, October 21, 2015

U-haul Camping at Lake Jocassee

Uhaul Camper at Devils Fork State Park South Carolina
Last year South Carolina State Parks ran a special deal for Black Friday on camping: by one night get one night free. I can't let a deal like that pass so I jumped on it and scheduled a camping trip to the mountains of South Carolina. There's several parks up that way: Oconee, Devils Fork, Keowee-Toxaway, Table Rock, and Ceasar's Head. We opted to try out Devils Fork.

Unfortunately, I had to move the dates due to family situations beyond my control. so we missed out on hitting it during the Spring. It's one of the only places in the world that you can see the Oconee Bell flower. So it would have been nice to see that during the spring but we ended up going in early October instead. It was still nice. The weather was great; it only rained one day. This time it was just me and the kids for a 5 day, 4 night trip. It was great to see them out in nature and exploring.
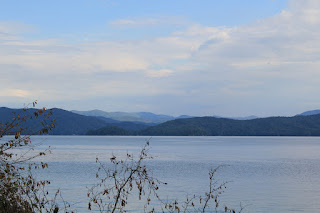
Lake Jocassee at Devils Fork State Park South Carolina
Devils Fork is on Lake Jocassee and is the only place that allows public access to the lake. They dammed up the valley/gorge at this point because 4 rivers flow into here before becoming the Keowee River. The dam is run by Duke Energy. While we didn't get to go out on the lake this trip, I expect in the future we will make another trip since it's only about 2 hours away. The campground is nice and we ended up in site 48 right across from the bath house on that loop. It was nice to be close to the bath house with the kids. The sites are nice and have water and electric. There are also some walk-in and boat-in campsites available too. There are 2 small trails at the park: the Oconee Bell Trail (1-mile loop) and the Bear Cove Trail (2-mile loop). We wandered down both of them on various days. The Bear Cove Trail winds out to a small peninsula with a great place for a picnic/snack break and nice view of the lake and mountains.

kids hiking at Devils Fork State Park South Carolina
While the park does have a playground for the kids, they do seem to lack kid/educational focused programs. Since they primarily view themselves as a boating/fishing park, I understand why they may be limited on kids activities. Still when I camp with the kids, I like for the parks we visit to have something engaging/educational for them.

We arrived on a Thursday and settled into camp. Friday was nice since most folks checked out and there was a lot of quiet time before the weekend crowd arrived. That's when we took advantage of some hiking followed up by smores.

Saturday it rained the entire day. That's always tough in a 13ft camper with little ones. (See my post on what to do with kids on rainy days.) Fortunately, I plan for times like this. We use over-the-back-of-the-seat DVD players in our car instead of a built in unit. I only put them in the car for long trips. We like that we don't have a video unit in the car 24/7. It also allows us the ability to move one of the units into the camper on rainy/cold days. So we watched some movies. I also took along a few books. We read half of Call of The Wild that day. They really get into the story when we read to them. My son is old enough to read to himself and he had a book of his that he had been reading through and took the opportunity on Saturday to indulge in it. We took a mid day trip out for lunch. It was about a 20-30 min drive to the closest big town. We found a McDonalds with an indoor playplace. That made for a good couple hours of playing and lunch. Later that evening the rain tapered off. We also played some games and bought a new camping themed game at the camp store.

Sunday was another beautiful day and we did some more hiking and played at the playground. We made mini pizzas for dinner that night. It's a fun since the kids get to make their own pizza. And we topped off the night with smores.

Monday was time to pack up. We broke camp early and headed out. We had one last thing on our list though before heading home. There are many waterfalls in the area. Some are long hikes; some are shorter hikes. A few are only viewable by boat on the lake. I had researched that one of the easier ones to get to was not too far away and on the way home. So we headed off to Oconee Station Historic Site.

Oconee Station State Historic Site South Carolina
Oconee Station is an old 1700s military compound that later turned into a trading post. Lots of Oconee and Cherokee Indians inhabited the region back then. They only do tours of the inside of the buildings in the afternoon (1-5pm at the time I'm writing this). So definitely check the website if you want a tour. We walked around the outsides for a bit and then hit the closest hiking trail.

Station Cove Falls South CarolinaThere is a pond and a loop trail around the pond, but the loop trail extends off and connects over to the Palmetto Trail. It also connects to Station Cove Falls Trail. Station Cove Falls is a 60 foot waterfall that is a relatively easy hike to get to.

There are two way to get to the trail head. Either drive down the road from the entrance to Oconee Station and park at the trail head, or hike from the Oconee Station parking lot past the pond. Since we had the camper in tow, it was easier to park at Oconee Station Historic Site and hike over. It may have added a .5 mile or so to the hike. The hike from the trail head is .5 miles to the falls. It's also a relatively easy walk; though not a paved path. The kids had a fun time playing in the falls for a bit and then our grand adventure moved to a close as we headed home.
Monday, October 5, 2015

Camping Essentials Survey

I'd like to hear from you!  I've put together a brief 5 question survey and I'm excited to get your feedback. Please take a few minutes to fill out the survey. Thank you in advance!


If you don't see the survey above, please click here to go to the survey.

Tuesday, June 30, 2015

Coleman Beach Shade Review Follow-up (Video)

Previously, I did a review of setting up the Coleman Beach Shade that we got for our trips to the beach to replace the umbrellas. Well we took it to Hilton Head Island, SC for a beach trip last weekend. Here's a follow up video below of how it held up even through a big thunderstorm. More details below the video.

3 Highlights from using it at the beach:

  1. This tent will stand up to at least ~15-25 mph winds.
  2. You need to buy a few more stakes to really help secure it on a windy day.
  3. It will take 2 people to put up or take down during wind.
So first, I didn't have many problems putting it up. Again the mesh where the poles go through proved to require more effort to not catch on the mesh. They really should make them like normal sleeves. The mesh pole sleeves are my biggest complaint about this tent. The tent comes with 6 stakes but I'd feel more comfortable with 8. I will be adding at least 2 more to my kit. The front mat/door has stake points under it when down as a mat that would likely have limited some of the wind going under it. So do grab a few extra stakes.
Guy lines. These are really important to get them right as they are one of the keys to keeping the tent down and helping it maintain it's shape during windy conditions. DO NOT USE stakes on the guy lines! Unless you are going to use heavy dute dog tie outs (which is an option) they'll flex and pull right out of the ground. One of the great things about the Coleman is that they also give you sand bags (in addition to the stakes). Here is the one key to using sand bags that will keep your tent there while everyone else's is blowing down the beach. Fill them and BURY THEM! That's right, a sand bag on top of the sand will just slide and slow down a tent that's moving. it will not keep a tent from moving. Fill the bags and dig a 1-2 foot hole to bury them in. Pack the sand down on top of them and your tent won't go anywhere. Seriously, our tent was the only thing left on the beach after the major thunderstorm hit. Due to the lightning, we had to leave the beach with the kids and seek shelter. I would've been happy to ride it out inside the tent. I strongly believe we'd have been fine.
I checked the weather charts and the winds were a good 15-25 mph. During the afternoon while we were there. While the tent stayed put the entire day without any issues, packing it took some effort. It was really windy when we left so it took two of us to pack it down. I pulled the sand bags and the poles out and my brother-in-law sat on the tent to hold it down. then I pulled out the stakes one at a time and folded the tent (with my brother-in-law moving to stay on top of it the whole time till I got to the point to roll it up).
All around I'm glad we had it and it worked well even with me wishing it didn't have netted pole sleeves and wanting to add more stakes. I wouldn't put it up for a short beach trip; too much effort to me. But for a full day on the beach it definitely works. It's more sturdy than an umbrella and a heck of a lot lighter than carrying a tailgate tent.
Coleman Sunshade

Wednesday, April 29, 2015

Camper Bunk Bed Poles

Folding Poles for Camper Bunk Beds (by TopLine)
TopLine Folding/Locking Legs
While looking at some camper parts online, I stumbled on a company (TopLine) that makes folding poles of various sizes that can be used for bunk beds. There's obviously a lot of other options for using these (folding table, etc) but the bunk option is the one that's the most interesting to me. Currently my poles are still in fairly good shape but if I need to replace them, I know where to find some now.

Likewise, if you need replacement poles for your bunk or you're looking to add a bunk to your camper. Check out these, they might work. They come in 4 lengths:
  1. 16" [FL3400-16]
  2. 24" [FL3400-24] (should fit the U-hauls)
  3. 27.5" [FL3400-275]
  4. 30.5" [FL3400-305]

You can also see my previous post about pole stability and the post about mods I made to our bunk bed in the U-haul.

Monday, March 30, 2015

18th Century Colonial Market Faire at Fort Yargo State Park

18th Century Colonial Market Faire at Fort Yargo State Park
Every year in the Spring, the Fort Yargo Historical Society puts on their 18th Century Colonial Market Faire at Fort Yargo State Park. I have heard about it but had never been. This weekend we decided to go. We had half the day free and my son didn't have a ball game so we decided to go see what it was all about. Fort Yargo is one of those state parks with tons of things to do: boating, fishing, mountain biking, camping, cabins, yurts, hiking, putt putt, etc. (Fort Yargo is also one of Georgia's First Time Camper Parks which is pretty awesome since there's so much to do there.) I wish we had planned more in advance and taken "CC" over there to camp for the weekend.

Monday, March 23, 2015

Coleman Beach Shade Review (Video)

Coleman Sunshade After our trip to the beach last fall, we decided to ditch the beach umbrella and move to more of a shelter/shade. We looked around and read lots of reviews. We found a good deal at Amazon on the Coleman Beach Shade. So that became one of our Christmas gifts to ourselves. I've been waiting on winter to end and a few days of sun to set it up in the yard and make sure it's all there and that I know how to do it. (I'm a big advocate of putting up a new tent/canopy at home prior to using it on a trip.) Here's a video below of my review and setup of it. More details below the video.

It went up pretty easy. I would say it took me about 10 mins to put it up by myself. It's fairly simple with only 3 poles: 2 black ones that go front to back in a parallel manner, and 1 longer grey one that crosses perpendicular to the black poles. The grey pole took a bit more care to thread through the mesh netting. It didn't slide through like most tents do. When I took it down I had to concentrate on unthreading the grey cross pole carefully too. It's really not that bad though and the first time you do it you will see where the trouble spots that it's likely to get caught are at. I expect to put it up faster in the future now that I know where those are. Due to that, it might be easier to have 2 people to get the grey pole in place and the ends locked into their grommets.

The design seems fairly good. The ends of the poles are tapered a bit to easily fit in the grommets. The grommets seem secure in the webbing at the base. It provides a decent amount of shade considering how small it packs down. Also, you can zip it up totally to make a changing room if you need one (though it might get hot without leaving the doors/windows cracked some for ventilation).

I think it will serve us well. I will follow up with further review after our next beach trip. We might even find other uses for it at other outdoor events.


Monday, March 9, 2015

What is U-haul Camping?

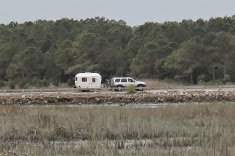
Uhaul camper at 2013 Fiberglass Egg Rally in Townsend Tn
The other day there was a post by another blogger about what type of camping they do. It was an interesting and read and like most things you can categorize camping differently. This author's approach was more about camping lifestyle categories. I would've probably used a different way to categorize camping, but I like the idea of "rural camping" that the author portrayed." Now I'm comfortable with many types of camping even though the rest of my family isn't. As I thought about it more, I realized that most commonly there are three ways to categorize camping: amount of time spent, type of shelter, location.

Amount of Time Spent

So most commonly, you probably hear of campers divided into one of 3 groups:

  • Weekenders - People like us that may take an occasional week long trip. Mostly we do weekends or long weekends amounting to 2-4 nights at a time. 
  • Snowbirds - People who have a camper and move south for the winter. They typically spend a month or more at each campground and go around from one to the next for several months between Dec and March. These folks typically come from up north down to the south to avoid the cold and bad weather hoping for a milder climate.
  • Full-timers - People who live almost exclusively out of their camper. They may visit family or friends sometimes but they typically move from campground to campground all year long. A lot of full-timers do "snowbird" in the south but they don't go home when the ice/snow melts. 

Type of Shelter

Hammock Camping in North Georgia
My Hammock Camping Setup
The other common category is based on the type of shelter and loosely around location too.

  • Tent - Typically includes tent, hammock, or tarp. (I'm including ultra-light hiking/camping here)
  • Camper - Typically involves Popups and Travel Trailers 
  • RVing - Mostly bigger Motorhomes and 5th wheels and maybe some large Travel Trailers
Location

  • Backcountry - These folks typically hike or boat or ride (horse, bike, 4-wheeler) into a remote area and camp. For shelter they carry with them either a lightweight tent, hammock, or tarp.
  • Car Campers - Typically involve a campsite and a tent setup near the vehicle. Can involve camping in vans too. Frequently at campgrounds but not always.
  • Boondocking - Typically a camper or RV in places that don't have hookups and are not a designated campsite with a nice pad, fire ring, or picnic table.
  • Campground - Camping in a designated campground with sites and hookups. 
And you thought you just wanted to go camping. It's good to remember all these differences since what I think of isn't necessarily what you think of. My idea of camping is almost all of the above. The one thing that is not my style is RV'ing. Don't get me wrong. If you want to give up your house and hit the road that's great. Especially if you like to travel and give back by volunteering at different places. But if you have an RV and a house, well that just makes your RV a condo on wheels to me. Not really camping. 

I've done backpacking, tent (car camping), and now camping with a travel trailer. I really do like them all. Right now the U-haul meets a great need for our family. When the kids are older we may add a tent back in to the equation. I'll probably take them backpacking when they're old enough also. I want them to experience all the differences (ok well not the RV with the big screen TV's and leather recliners). 

Uhaul Fiberglass Camper crossing the ford at Huntington Beach State Park, SC
So what is our type of camping? To me it's getting out there with the family. Changing up your environment and working with what you have. Meeting new people. Having great meals. Sitting around a campfire relaxing and telling stories/jokes. It's an opportunity to show my kids the great world we live in and take them to places I may not otherwise be able to take them. It's learning about history, nature, and science. Most importantly, it's about making memories as a family.

Why do you camp (or want to)?

Monday, February 16, 2015

Trailer Tires...A Camper's Biggest Friend or Foe

Uhaul Camper Tire Pic
There's a lot to be said about tires for campers. They can make or break a trip. You always want to go through a checklist before a trip. But there's a couple things you need to consider with tires whether you own a trailer or are looking to buy one. The first thing to understand is that trailer tires take more abuse than car tires due to trailer bounce while driving. Also, they sit a lot when not being used. So trailer tires are more likely to dry rot before the tread wears out. So lets talk about two topics related to tires: how to tell the measurements/size you need, and how to tell how old a tire is.

Tire Measurements

There are a lot of numbers/codes on a tire. They all give you some information about the tire itself. Most folks are familiar with something like P225/70 R15 on your car. This is the type and size designation of the tire. P at the beginning stands for P-metric (or passenger car in the US). It's never a good idea to use P-metric tires on a trailer. They aren't designed for trailers and if you put them on a trailer you can't go by the load capacity on the tire. LT (Light Truck) and ST (Special Trailer) tires are typically used on trailers. So you should look for LT or ST for your trailer.

The second part of the code (225 in this example) is the measure in millimeters from sidewall to sidewall of the tire. The third part of the code is the aspect ration which simply means the percentage of the height to the width of the tire. Basically the bigger the number here, the taller the sidewall. R stands for radial (which is most tires today). And the last digit is the wheel/rim diameter that the tire is supposed to fit. There are plenty of information on tire websites that goes into more specifics but that's the basics on tire size. My tires on the U-Haul are ST175/80 R13.
Picture of U-Haul Fiberglass Camper tire size

If you buy an old camper, you may find Bias Ply tires rather than Radial tires. They are sized differently. Your best bet is to take the tire/ or the numbers on the side of the tire to a tire store to get a replacement. Bias ply tires have been phased out over the years in favor of the softer ride of radials.

How old is my tire?

uhaul camper tire coversKnowing the age of the tire is just as important as looking at the tread (especially for those of you buying a camper who may have to drive it a ways to get home). If you want to know the gritty specifics on why tires dry rot, ask your friend who took chemistry in college or Google it. Basically, think of old rubber bands, The oils and chemicals in the rubber break down and some evaporate over time and the rubber gets more brittle. This makes it more prone to cracking and blowouts. A big cause (or accelerator) of this is UV rays from the sun. For those who are new to campers, you probably thought those tire covers on other campers were just for looks or to keep the tires clean. Not really. Veteran RVers know that shielding them from the sun will make them last longer. You may even want to get a cover for that spare tire to make it last longer.

Picture of U-Haul Fiberglass Camper tire date code
All tires, in the US at least, are manufactured with an Tire Identification Number (TIN). The same code is stamped on every tire in a batch. The TIN is the code after the DOT part on the tire. as you can see in the picture on the right from my tire. What we care about is the last 3 or 4 digits on the tire. For tires made before 2000, there will be 3 digits at the end, for those made after 2000 it's 4 digits. So right away if I bought a camper with there being 3 digits only at the end of the TIN, I'd go get a new tire. For those made after 2000, the 4 digit code is easy to read, the last 2 digits are the year the tire was manufactured. That will tell you how old the tire is. (The preceding 2 digits are the week of the year.) So in my example to the right, This tire (my spare) was made during the 16th week of 2012 (1612).

So now you know how check your tires. I can't stress how important this is for those buying used or vintage campers to look at the dates on the tires. When I bought our U-Haul fiberglass camper, the tires on the camper were decent age but the spare was a bias ply that was probably 20-25 yrs old. I replaced that the first week as my very first "project" on the camper. I just wasn't comfortable trusting that spare if I needed it. Oh and always carry a spare! If you are buying a camper and it doesn't have a spare tire, then I'd recommend trying to find one before you go on a trip.

I hope this helps some of you. Feel free to drop me a line or comment below if you have any questions.

Thursday, February 12, 2015

Camping With Kids: Games and Activities

Camping with kids typically involves coming up with entertainment or activity ideas. While some of us would love to take naps and read books while camping. The kids want (and need) to be active. And you need them to be active too. An active kid is a better sleeper! Don't be afraid to wear them out during the day. Of course, activities depend on where you're camping and what the weather's like. Camping at the beach provides a lot of options if the weather is nice. Camping inland or in the mountains typically means trying out hikes or canoe/boat events on lakes/rivers/streams. And there's always the park rangers programs if you're at a state/national park or near one. I highly recommend taking advantage of them. One of the first things I ask when checking in, is what programs and activities they have going on.

Sometimes though you want to stay close to camp and relax. To keep the kids from pestering you for movies or video games on your Kindle (cause you probably want to read a book on that Kindle), you need to have some go to activities/games they can do around the campsite. Below is a list of some activities that we've either done or plan to do.


  • Scavenger hunts and camp/wilderness bingo. This is probably the easiest to do with almost no prep work needed. Come up with a list of things to find for the scavenger hunt. Camping with older kids might involve picture scavenger hunts where they take a picture (great if you're big on leave only footprints). A twist on this is camp bingo. Make some bingo cards out of cardboard or print some off like these and laminate them for use multiple uses with dry erase markers. There's many lists and bingo boards out there on pinterest and other sites if you don't want to come up with your own.
  • Horseshoes or ring toss. We have a small plastic kids set of horseshoes and ring toss that we keep in the camper. It's a great activity for the kids close to the campsite.
  • Ladder Golf and cornhole. Ladder golf is another activity that our whole family enjoys. I like that they are lightweight PVC and pack down. You can also get portable cornhole games too. 
  • Giant Jinga. I saw this on the web a while back and it's on my list of things to make. Though I will probably make a smaller version with 1x2s instead of 2x4s so that it will be more portable. 
  • Pet Rocks and Rock Games. Who remembers Pet Rocks? There is something to be said about an activity that involves being creative. We typically try to plan at least one thing to do that's creative during a weekend camp trip. Painting rocks is a lot of fun for little ones. You can either pick up some river stones at craft store or find your own when you get there. There are many games you can create with painted rocks too. Tic, Tac, Toe is probably the best one, but you can do your own rock dominoes, bingo rocks, or rock checkers. 
  • Card Games. Nothing passes the time inside during cold/rain than card games. Bring your favorites: Phase10, UNO, Spades, Spoons, etc.
  • Puzzles. Another option for indoor times are puzzles. Depending on the age of those involved 60-300 piece are probably about the right size without get too big. Make sure you it'll fit on your table or take a piece of cardboard if your tent camping. 
  • Bird watching or Leaf collecting. For those that want a bit of nature/education in there activity. Try teaching your kids how to make a journal on each trip of all the new wildlife or leaves/flowers they see. This can be a great way to engage the local rangers and learn more about the local ecosystems or even following up when you get home by researching what you found/saw. Guidebooks can also be a great resource to have for this.
  • Items to bring to engage/entertain. Some other items you may want to bring along to provide opportunities for playing/learning are magnifying glass, bug nets, compass, or stuff to make bracelets (beads, paracord, twine, etc).
  • Geocaching (or treasure hunting). This one requires either a GPS device or phone that has GPS capability. Geocaching.com and other sites have lists of local caches and it's fun for adults and older kids too. Georgia State Parks have a geocaching program and other states may have them too. 
  • Traditional Indoor Games. Lastly, I'll reference that typical indoor games like charade-based games or word games like Catchphrase, can also be a big hit at the campground. I'd stay away from board games with too many little pieces unless you are playing inside during the rain.
  • Get the kids involved in cooking! One thing they'll take with them long into the future and will become helpful when they get older is teaching them how to cook at the campsite. Plan meals that will involve some prep work and will be fun (I'll do another post later on some ideas for that). Even if it just starts with smores or baking potatoes in the coals, they'll love to be a part of it. (Heck you can even make your own custom smores sticks with a wire coat hanger and wooden dowel as a craft project.)
  • Take a hammock. Years ago after years of coveting one, I bought an ENO hammock. It has been a great investment and I've used it a lot. I've even been backpacking with it as my primary "tent." There are several other brands out there; some less expensive. The nice thing about a portable hammock is that it becomes whatever you need it to be: shade to sit under, a relaxing place to nap or read, a swing, etc. Pretty much every age will love it and you may find you need to buy more than one!
There's hundreds of websites with ideas for every age range of child of ways to entertain them outside or while camping. So do a search for more ideas via Google, Pinterest, etc. These listed should give you some starting points. Don't use them all on the same trip though. Save them up and pull them out when you need them. And for little ones, don't forget their toys. We have a play grill and food we carry in the camper so the little ones can "cook" up their own food at the site.

Leave your own ideas below! I'd love to know what you've done with little ones to keep them entertained.

Saturday, January 17, 2015

A New Year for Camping...

So the biggest thing I wanted for Christmas was some time to do some projects on the camper but I didn't get it. Ended up buried in house projects. Still hoping to find some time to do a few things and I'll post as I do.

It's 2015 now and I'm looking forward to a new year camping. We already have several trips lined up and I'm looking at options for more. I'm hoping to take the 6 yr old and do some tent camping on the side too.

So for Christmas I did get a couple of camping related items: some new s'mores sticks and a beach canopy. As anyone who has camped with kids will tell you, one of the most important part of the camping experience for them is s'mores! Yes, I know there's a lot more to camping, but the kids always seem to love/remember the s'mores part.

So of course we have smore's sticks we carry around. My wife did a crafty project with the kids one day and they made their own. Basically you cut a big dowel up to use for handles. Then get a bunch of old wire hangers (not the coated kind of course; don't want that rubber melting into the marshmallows). Straighten them and cut them to appropriate lengths. Then find a drill bit about that size and drill holes in the end of the dowel handles but a little wood glue down in there and stuff the wire down in the handle. then they can paint or decorate the handles. I will say thicker wire works better and don't get them too long or they tend to get flimsier.

Extendable Camp ForksI tend to be an efficiency minded person. This works well with camping with so many people in a small fiberglass camper. If I can find a more efficient way to pack, organize, or do something, I will go for it. So while I do love the smore's sticks created by my children's hands, Packing the sticks is a bit interesting. (trying to make sure they don't get bent or fly around the camper while traveling, etc) So my wife found some extendable ones that pack down really small. Our's look like the picture to the right but you can find various ones on Amazon. We'll see how they hold up but I do love that they pack down so small. I can actually put these in a cabinet rather than trying to shove them under the bed on behind the front bunk.

We also got a Coleman Beach Shade/Canopy. After our later trips to the beach with the little ones, I was wanting to get something more than the little umbrella we have now. I'll do a separate post and review on it when it warms up enough to pop it up.

Hope you have a great year filled with camping and travels!