Showing posts with label repairs. Show all posts
Showing posts with label repairs. Show all posts
Monday, November 2, 2020
Virtual Tour of our U-haul CT-13 Fiberglass Camper
Now that we finished some renovations, I created a virtual tour of our camper.


Wednesday, September 16, 2020
Freshening Up Our U-haul Camper

As things age, sometimes they need a little face lift. With a vintage camper, it's a bit tougher to decide what to do. Do you totally overhaul everything with a new look and feel? Or do you try to restore to original beauty? While my primary focus had been updates to the electrical system, I decided to use my new found energy and tackle some other things on the list.
Curtains
One of the first things we decided on was a color scheme. Originally, we started with a brown theme for the main bed and fun kid theme for the bunks. We had moved to wanting a more gray and white theme. My wife worked on bedding, sewing some throw pillows, and making new curtains (our 3rd set of curtains). For the curtains, she decided to use cloth shower curtain material since it holds up better to the moisture. Since we live in humid Georgia, and if the camper is closed up for a period of time, moister can build up from the fiberglass walls sweating. We definitely had a set of curtains get ruined by mildew in the past over a winter. I've since used damprid and sometimes a humidifier over the winter in there to try to keep it dryer. She found a shower curtain with a pattern she liked, cut it up, and made new curtains. We used 1 inch rings. I removed the rings and used the hooks with the clamps to hang on the original curtain wires. We got rid of the bottom wires and only use the top wire for hanging curtains now because it makes them easier to move.
Bedding


The bunk beds (see previous post on original makeover for smaller kids) have gotten a lot of use with our kids. As they've grown, we've needed to adjust the space a little bit. They got new bedding to go with their new lighting we'd added (see post on lighting updates). We originally had a piece of fabric between the two posts to keep our daughter from rolling out in the night. Now that she's older, crawling into her cave from the end was becoming a bit more challenging. So we removed that and I reused one of the lower curtain wires to string across the top of the posts. My wife sewed two small curtains with ties attached that can be tied to each post or untied and closed for privacy. Our daughter enjoys being able to enter the bottom bunk from between the posts now and still having her private cave.
Cabinets and Closets

In trying to find a balance between keeping the original feel/charm and updating, I opted to keep the cabinet and closet doors and paint them. I used Rustoleum Painters Touch spray paint in Satin Granite. I am really happy with the way they turned out. They look fresh and you can still see the texture and U-haul name on them. I also replaced the hinges which were starting to rust. The screw holes for the new hinges were just a bit off but the way they cover the old holes it wasn't a problem for me. I went with stainless steel which are a bit more but should hold up for a long time. I also spray painted the upper cabinet inserts and added lighting (see my post on lighting for how I did that).

I decided to update the closet while I was at it. We've had a 3 drawer plastic thing in there for years, but I wanted something a bit more stable. I wanted to use small clear containers with lids to organize so i could easily see what was inside and have some flexibility with the storage. When doing the lighting updates, I'd put some wood inside the closet to drill into and hold the lights. I took those down and cut some 3/4 inch plywood to form sides and then used some 1/2 inch wood to make shelves. Going with the theme, I painted them the same Satin Granite.
In an attempt to maximize storage, I removed the old propane heater. It was problematic and loud. This left a large area under the closet that I could work with. I installed a ClosetMaid 11-inch wide organizer that slides on a track. This organizer is 20 inches deep and has a ton of room in it. Since it slides, it also is easy to access.
Counter

The biggest project by far was the counter. I crafted a wood counter top to fit over the fiberglass counter. I had previously purchased a new Dometic SMEV PI8022 stove years ago. The new stove sinks down into the counter and has a glass top that closes over it to provide additional counter space. It also makes the space feel bigger since there's more room between the top of the stove and the hood. The old hood was rusting and had electrical issues so I replaced it with a new hood.
Since I had to cut the bolts off the original sink and it was showing signs of wear, I opted to buy a new one that was the same size. The one I bought also came with the drain hardware but it was plastic not stainless. So I went to Lowes and bought a Stainless Steel drain with a strainer/basket to install. I also decided to upgrade the faucet. The old 2-way faucet is the normal one found in pop-up campers. It's designed to pump manually for onboard water, or hold down when city water is hooked up. Since we don't use the onboard water tank, I wanted to install a nice looking faucet that would work with city water. (If I ever decide to use the onboard, I'll look into an electric water pump.) This opens up the realm of faucets to anything on the market for homes too. I found that a bar faucet is the perfect size. It's not a full size kitchen faucet that's super tall, and not a tiny bathroom faucet. It's the Goldilocks faucet. When installing a new faucet, you need to be aware if you have hot water or not. We don't, so that meant I had 2 options for the hot water feed line: cap it off or connect it with a T connector to the cold water line. I opted for the second option since it would allow the water to flow through both lines no matter whether the handle was directed towards hot or cold. If you opt to cap the hot water line, you will find you need to adjust the handle to full cold to get maximum flow.
I'm really glad that life slowed down enough to get some updates done. We're happy with the results so far and will continue working on our list of things we'd like to update. I'm investigating adding air conditioning to the camper to make it more usable in the hot, muggy southern summer months and there's a few more electrical updates I'd like to tackle. More to come...
Monday, November 13, 2017
Wheeling


Just for information, I use Carlisle Radial Trail (the existing tires were RH and the new spare is an HD) tires for the camper. Greenball is another highly recommended brand. Don't just buy the cheapest brand that you would normally throw on a small utility trailer that you don't use everyday. While you may not be using the camper everyday, you want something more dependable due to the number of miles you will drive when you are using it and the weight, heat impacts and bounce. After all, it's better to not have to use your spare. For more info on tires see my earlier post.


Monday, June 19, 2017
The Second Spare

I opted to use existing holes. The coupler is attached with three .5 inch hex bolts and has the handle welded to the top of it. The tire mount comes with 4.5 inch long .5 hex bolts. These are the same size just longer. So I removed to rear two hex bolts from the coupler and attached mount there without having to drill new holes. I used the bottom holes because they are spaced perfectly and I wanted the tire to be high so no chance of it hitting the ground. I had to mount on drivers side due to the jack being on the passenger side. I also had to make sure because the bolts were long that they pointed the right direction so the tire could mount flat against the side of the tongue (didn't want them poking or rubbing a hole in the sidewall). The back plate that came with the tire mount wouldn't work as it was too thick and blocked the jack from swinging into place. So I got a kit at the auto parts store for hanging leaf springs and used a U-bolt from the back to add a little more support. I may keep my eyes open for a thinner back plate or try to make one in the future but for now it's secure.

I think this will work out and was an easy mod. Having 2 spares on the trailer is a good insurance policy for the long hauls. I've also bought a bottle jack to keep in the trailer.
Wednesday, June 14, 2017
Lets Talk Hinges

 |
| Out with the old. |
 |
| In with the new. |
Tip: When working with tiny bolts and the t-nuts in the tiny openings, you can't fit your fingers ( could only fit one) in there to thread the nuts on the bolts. So what I did was take another bolt and back screw it halfway into the t-bolt and then use that to help thread it on the bolt from the front. Once the front has gotten halfway threaded, I backed out the other bolt and tightened the front bolt down. I did use my finger to push the t-nuts against the wood and hold them while tightening.
 |
| T-nut back threaded halfway with bolt to hold in place in hole while threading the regular bolt through the wall of the camper. |
With the new hardware the hinges are again secure. Hopefully, I won't see any more bolts coming loose when I'm driving and the door will be more secure. All in all a quick maintenance job.
Thursday, June 8, 2017
Facelift

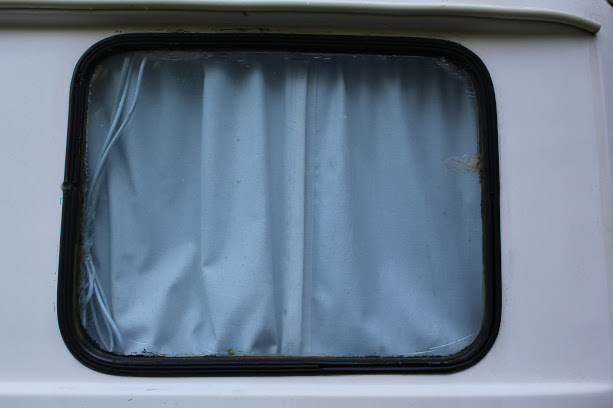 |
| Old Plexiglass Window |
 |
| New Old Stock Window |
 |
| Before New Paint (but freshly cleaned) |
 |
| After New Paint (Shiny!) |
So with the facelift done, I'm turning my focus to some other tasks as I prepare for our next big adventure with her. More updates to come over the next month or two as we continue some work and find some time work in adventure.
Wednesday, April 29, 2015
Camper Bunk Bed Poles
 |
| TopLine Folding/Locking Legs |
Likewise, if you need replacement poles for your bunk or you're looking to add a bunk to your camper. Check out these, they might work. They come in 4 lengths:
- 16" [FL3400-16]
- 24" [FL3400-24] (should fit the U-hauls)
- 27.5" [FL3400-275]
- 30.5" [FL3400-305]
You can also see my previous post about pole stability and the post about mods I made to our bunk bed in the U-haul.
Monday, February 16, 2015
Trailer Tires...A Camper's Biggest Friend or Foe

Tire Measurements
There are a lot of numbers/codes on a tire. They all give you some information about the tire itself. Most folks are familiar with something like P225/70 R15 on your car. This is the type and size designation of the tire. P at the beginning stands for P-metric (or passenger car in the US). It's never a good idea to use P-metric tires on a trailer. They aren't designed for trailers and if you put them on a trailer you can't go by the load capacity on the tire. LT (Light Truck) and ST (Special Trailer) tires are typically used on trailers. So you should look for LT or ST for your trailer.The second part of the code (225 in this example) is the measure in millimeters from sidewall to sidewall of the tire. The third part of the code is the aspect ration which simply means the percentage of the height to the width of the tire. Basically the bigger the number here, the taller the sidewall. R stands for radial (which is most tires today). And the last digit is the wheel/rim diameter that the tire is supposed to fit. There are plenty of information on tire websites that goes into more specifics but that's the basics on tire size. My tires on the U-Haul are ST175/80 R13.

If you buy an old camper, you may find Bias Ply tires rather than Radial tires. They are sized differently. Your best bet is to take the tire/ or the numbers on the side of the tire to a tire store to get a replacement. Bias ply tires have been phased out over the years in favor of the softer ride of radials.
How old is my tire?
 Knowing the age of the tire is just as important as looking at the tread (especially for those of you buying a camper who may have to drive it a ways to get home). If you want to know the gritty specifics on why tires dry rot, ask your friend who took chemistry in college or Google it. Basically, think of old rubber bands, The oils and chemicals in the rubber break down and some evaporate over time and the rubber gets more brittle. This makes it more prone to cracking and blowouts. A big cause (or accelerator) of this is UV rays from the sun. For those who are new to campers, you probably thought those tire covers on other campers were just for looks or to keep the tires clean. Not really. Veteran RVers know that shielding them from the sun will make them last longer. You may even want to get a cover for that spare tire to make it last longer.
So now you know how check your tires. I can't stress how important this is for those buying used or vintage campers to look at the dates on the tires. When I bought our U-Haul fiberglass camper, the tires on the camper were decent age but the spare was a bias ply that was probably 20-25 yrs old. I replaced that the first week as my very first "project" on the camper. I just wasn't comfortable trusting that spare if I needed it. Oh and always carry a spare! If you are buying a camper and it doesn't have a spare tire, then I'd recommend trying to find one before you go on a trip.
I hope this helps some of you. Feel free to drop me a line or comment below if you have any questions.
Tuesday, July 22, 2014
Rock Guards on Fiberglass Campers

The front window is a solid glass window. Unlike the door, rear and two side windows, which slide open and have a screen, the front has no way to open and therefore no screen. There are two types of rock guards on fiberglass campers that I've seen: a solid plastic/fiberglass piece that clamps to the front window (Scamps seem to have this style) and a hinged piece with shocks. The Uhaul comes with the later. I suppose having a hinged guard vs a removable piece that could get lost is better in a rental environment.
The nice thing about the Uhaul rock guard is that I can open and close it as needed. I tend to close it at night since it's right at the top bunk and it blocks out the sun in the morning to let my son sleep a little later. Granted that's a benefit only applicable to those with kids on the top bunk but for us it's a big one. I also like that when open it provides some shade over the window. You can even use the shocks to hang towels on to dry if you're at the beach or anywhere that you may be swimming. The one downside I can see is that since it shades the window so much it does block out some of the vistas you could view out the front. That's minor for me as I tend to have the car parked in front of it most of the time. (Some folks have said they don't like having the rock guard at all so they can see all the way through the camper and out the back window when towing.
When we first got the Uhaul I noticed a couple of issues with our rock guard. (Which I must say from the folks I've talked with and those I've seen for sale since, not all of them still have theirs.) It's made of plastic so like with anything plastic it's a bit brittle after so many decades. It's hinged at the top. Ours had apparently been broken at the hinge point on one side and the PO had moved the hinge over toward the middle and re-riveted it. So we do have a "hole" in the top side when it's closed which does allow for rain, leaves etc to come through. I do have to clean out the leaves before a trip since it's parked under a tree at home. I may try to patch it at some point.

 The other thing I noticed with ours was that there were issues with the shocks. The original shocks were lightweight and after a few decades had worn out. I took the original shocks to an auto parts store and I matched them for length and bolt size. The pressure in my replacements is likely higher than the original ones when they were new. But I don't see any undo stress. If you have issues with yours, then I recommend replacing them.
On a side note, if you do not own a rivet gun, I'd invest the few bucks in one with a fiberglass camper. They're really useful; especially with the double hull of the Uhaul. They will allow you to attach things to the outside without having to drill through both hulls and using bolts on the inside. The hardware that connects the shock to the camper had snapped a rivet and the other one was close behind. So I ended up re-riveting it and it was quick and simple. Here's a link to a video on how to use a rivet gun (https://www.youtube.com/watch?v=WPwNsQMnx88). It's pretty simple once you get the hang of it. Just make sure you use the right size rivets for the job.
Feel free to comment with any questions.
Monday, May 12, 2014
Bunk Bed Stability
 |
| Rubber Cone-shaped Bumpers |

See my post on replacement poles for the bunk bed if you're looking for those.
Monday, April 28, 2014
Bunk Bed (Camping with Kids)

There are a couple of problems with the design though:
- There is nothing on the top bunk to keep a kid from rolling off during sleep.
- A really small kid (2-3) on the bottom bunk could potentially roll off between the poles.
- The poles rely on gravity/weight to keep them in the holes. They are not fastened to it any way and can bounce out. Or it's possible for a child on the lower bunk to kick it out during sleep. This could potentially cause the bunk to come down. (Do not drive with the bunk setup; road bounce will make it come down!)

 The top bunk is backed by a piece of plywood. I picked up a couple of right angle shelf brackets and had an extra board laying around that turned out to be the right size. I used some wood screws to hold the brackets to the bottom of the bunk. I measured them so they could stay attached and be under the bench cushions when it's folded down. The distance measured is between the bottom cording of the top bunk cushion (when it's folded down as the back of the bench) and the top of the fiberglass bottom of the bench with cushions removed. I can put the cushions on the bench on top of the L brackets and you won't even know they're there. I then drilled holes in the wooden board and got a couple of nuts with locking washers and wing nuts to fasten the board. That way I can quickly unfasten it for travel. This provides the protection I needed for my 4 yr old not to roll off the top bunk in the middle of the night. It's been working very well for us. The reason I went with a board was because I didn't want a gap from pvc or other tubing that he'd get his legs caught in. The solidness of the board combined with the small curtain we put up that hangs from the ceiling also help provide the sense that it's his own room. I have a small Tupperware container that I keep in the cabinet over the stove that I put the nuts, washers and bolts in when I have it broken down.
 |
| My wife's fun camping fabric. |
 |
| Close-up from back side |
To resolve the issue of the poles possibly bouncing/sliding out of their hole, I looked at rubber bumpers. I have ordered some conical bumpers that measure 21mm x 12mm. My camper has wooden boards under the lower fiberglass to help transfer the weight of the upper bunk poles down through to the frame without cracking the fiberglass seat area. With a screw, washer and these rubber bumpers, I should be able to secure the poles pretty easily by having them slide over the bumpers. I'll post an update when this is done with pics. (EDIT: Post on bumpers.)
|
| Kid's Bunk in our U-haul Camper |
(Update: See my post on replacement poles for the bunk bed if you need those.)
(EDIT: Post on the other bed; the one us adults use. )
Monday, April 7, 2014
Flooring Upgrade in the U-haul Camper
 |
| New Vinyl Plank Flooring |
The thing about the Allure is that it's vinyl and links together to form a waterproof floating floor. It's changing the way bathroom flooring looks in the housing market. There are two types of Allure: regular Allure and the Allure Ultra. The regular uses grip/glue strips to link together. The Ultra version uses interlocking mechanism. The Ultra is more expensive. But I feel like it'll hold up and I love the way it looks. I'm willing to invest in a heavy duty floor. We went with the Durban Oak color. It did take me a little more than a case. So I ended up with two cases and several left over pieces (maybe half a case?). I figure if something happens to a plank at least I have replacements.
After some thin wood strips to help level the floor in a few areas. (Note that the sides where the inner shell meats the outer shell and the middle seam are raised a bit.) I tried to keep it simple and started at the back of the trailer and moved to the front laying planks as I went. The very front under the bench curves up. So that's why I started at the back. I did not yet put down any molding over the edges though I'm thinking about it. As of right now I can take the floor up if I need to since it's interlocking and not the glue strip version. Make sure you leave the case of flooring in the camper for a day or so when you get ready to do this so it adjusts to the temperature of the camper. These floors will expand/contract with the heat/cold that is experienced in the campers throughout the year. So you may want to do it in the summer when expansion is more.
Overall we like the flooring. It is so much easier to sweep out and keep clean with the kids and dogs running in and out. I think it's going to hold up for many years to come.
Wednesday, March 19, 2014
Camper Electrical Part 1
So electrical is a big part of any camper. Let me start by saying the Uhaul's come in two models: CT13 and VT16. Mine is a CT13 and so that's what I'll be talking about here. Though much of this is the same across many campers. It can also be confusing unless you understand that there are 3 electrical systems in these small campers:

 The power cord goes up to an electrical box where the single outlet and pop-out circuit breaker are on the side of the cabinet over the sink. There is another cable that goes out from this box to the converter (to convert the AC to DC to charge the battery and run the lights/fans while plugged into shore power). The previous owner of mine had run another cable from her down to the area below the sink with a female plug on the end to plug the dorm fridge into.
 First thing before you begin working on AC is to make sure you're not plugged into shore power. Next I took off the outlet and separated it from the box. Then unplugged the circuit breaker and replaced it with the new one. I got a Sea Dog 15amp thermal push button breaker. I had to widen the hole a little bit as the diameter of the new one was a big larger than the old one.
 I decided a few more outlets would be helpful. After cutting the fiberglass to widen the fridge area to fit my new larger fridge, it's a messy job and I'm afraid I may not be as skilled at patching holes in fiberglass. So I wanted to limit holes. I picked up an 8-ft, 4 outlet shop extension box from Lowes. I liked that it has it's own circuit breaker built-in and an on/off switch. I connected this to the extension from the top cabinet. I cut a hole in the sized of the cabinet under the sink (it's plastic and easier to deal with). I then put a couple screws in and hung the box on high on the back wall of the cabinet. We don't use that cabinet for much and nothing tall so it was a good spot. I plugged the fridge into that box and it leaves me with 3 outlets without having to install boxes and face plates.
As a side note, I cut a piece of an old rubber car floor mat and riveted it to the side of cabinet over the hole I had cut. I then slit the rubber so I could pass the plugs through. It was a quick way to cover the hole and hopefully provide a little insulation and better looking to me than an open hole.
I'm happy with the outcome. I may go back and upgrade to a 30 amp system at some point. The new pop-out circuit breaker fixed the problem I was having. I'll dive into the other electrical systems in the future as I tackle them.
- AC (120V on a 15 or 30 amp circuit). This is your normal household current and the receptacles in the camper look like a typical household plug. If you're not plugged into shore power then your items that rely on this won't work.
- DC (12V). This is the items in the camper powered by your battery and converter. Most of the internal lights, fans run off this. This is the same 12V power as your car. Unlike in your car where you have an engine turning an alternator to produce the electrical current, campers have a converter. It's a device that converts the AC to DC and charges the battery.
- Trailer lights (brake, turn, running). While the AC and DC systems are connected by the converter, the trailer light wiring is totally isolated from the other systems. It's power comes from the tow vehicle via the 4-, 5-, or 7- pin adapter that you hook up when towing. It includes the brake lights, turn signals, and running lights.
I started with the AC system. One reason is because I was replacing the dorm fridge in my unit. These units originally came with just an ice box. But mine, like many I've seen, had been ripped out in favor of a fridge. I happened to have a slightly larger, stainless model that I used to use at my office at my old job. I had it in storage since I changed jobs and decided to replace it cause it looked better than the old brown one the previous owner had installed.
I also had been having an issue during our first two trips with the thermal circuit breaker popping. After carefully adding up the amps I was using when it popped, I was way under 15 amps. So this led me to the conclusion after a little research that the old thermal breaker was worn out. These breakers do tend to pop at lower and lower voltages as time goes on. So 30 yrs later, this breaker was shot. I managed to find a replacement online. So I ordered one of those to install.

So first things first. Shore power comes via an electric cord that is stuffed inside the shell. It comes out the utility port on the driver side. You pull it out to plug in. When you're done, you can push the cord back into the wall of the camper. I may end up replacing the cord in the future if I decide to upgrade to a 30 amp system. If I do, I'll replace it with 10-3 type SJOOW electrical cable.
So first things first. Shore power comes via an electric cord that is stuffed inside the shell. It comes out the utility port on the driver side. You pull it out to plug in. When you're done, you can push the cord back into the wall of the camper. I may end up replacing the cord in the future if I decide to upgrade to a 30 amp system. If I do, I'll replace it with 10-3 type SJOOW electrical cable.
The power cord goes up to an electrical box where the single outlet and pop-out circuit breaker are on the side of the cabinet over the sink. There is another cable that goes out from this box to the converter (to convert the AC to DC to charge the battery and run the lights/fans while plugged into shore power). The previous owner of mine had run another cable from her down to the area below the sink with a female plug on the end to plug the dorm fridge into.As a side note, I cut a piece of an old rubber car floor mat and riveted it to the side of cabinet over the hole I had cut. I then slit the rubber so I could pass the plugs through. It was a quick way to cover the hole and hopefully provide a little insulation and better looking to me than an open hole.
I'm happy with the outcome. I may go back and upgrade to a 30 amp system at some point. The new pop-out circuit breaker fixed the problem I was having. I'll dive into the other electrical systems in the future as I tackle them.
Tuesday, March 11, 2014
Rain, Rain Go Away
So the first thing I discovered with our new Uhaul was the leaks. Due to the way the windows are made and mounted, as the old parts wear out the tend to leak. Most Uhaul owners have to deal with this at some point. Try not to silicone if you can. It's a mess to get off later. That being said I have patched some areas with roofing sealant in small doses. I found out a couple of ways to deal with our leaks.
1) Limit the amount of water running over the window.
This is a no brainer. If the window's leaking then a percentage of the water running over it is coming in. So decreasing the amount of water running over it will decrease the amount coming in. This is not a final answer as during heavy down pours you're going to see a lot of that water still coming in. However as a first step to resolving my leaks, I decided on gutters. Now you can figure out how you want to do those, if you want to make your own or use window shields. I went with a vinyl product that's pretty simple to work with and uses heavy 3M bonding tape vs drilling holes in the side of the fiberglass.
EZE Gutters
 Basically you can buy this by the foot and it comes in a long roll. Then measure out where you want and cut. I think I used a pruning shear to cut it and then finished the end with a box cutter. You want to make it curve down on the sides a bit. This is will help make sure the water channels correctly. From my experience this definitely helped.
I also had problems with the door leaking and used some extra I had inside the top of the door to make a channel. I'll have a separate post about that coming up.
2) Clean out the window traps.
On these windows there is felt in the tracks. (that you can replace if you want to take the window apart and drill out the rivets. There's a guide on FiberglassRV site to do this. Also a PDF of that thread exists here.) There is also some drain holes. Mud and yuck tends to build up in these tracks. and can block the drain holes. So before you go tearing your window apart to replace or grabbing a sealant, clean out the tracks. You'd be amazed at how much that can do. There was so much gunk and bugs in my rear window track that the water caught in the track would backup through the felt and bubble up the inside track.

Here's how you should clean them. First pull up the seal. Go ahead and pull it all the way out. You'll want to clean it out/off. I thought about replacing it but haven't found replacement yet. Now get some tools and get in there and clean out that track where the seal sat. You may find dirt, grime, and all sorts of yuck. You may find a small flat head screw driver and an old toothbrush helpful here. Some silicone spray will help. Make sure the drain holes are clear too. Some folks have drilled them slightly larger to allow for the water to flow out faster.
3) Finally, you may want to replace the weatherstripping (it's gets old and cracked and dries out) that holds the windows in place. Most of the fiberglass campers have clamp ring style windows that I think seal better by clamping to the fiberglass. The Uhaul windows are different in that they sit inside a weather stripping seal that surrounds the hole in the fiberglass. I have not done this yet but I plan to and I will document what I do when I get around to it. My Uhaul came with one window busted out and a plexyglass piece in place. That's the worst leak I had to deal with was that window. I did get my hands on another Uhaul window (rare) and I'm planning to pull out the plexiglass and put in the new one. More to come on that when I get around to doing it....
For now I have no leaks. So I'm happy.
1) Limit the amount of water running over the window.
This is a no brainer. If the window's leaking then a percentage of the water running over it is coming in. So decreasing the amount of water running over it will decrease the amount coming in. This is not a final answer as during heavy down pours you're going to see a lot of that water still coming in. However as a first step to resolving my leaks, I decided on gutters. Now you can figure out how you want to do those, if you want to make your own or use window shields. I went with a vinyl product that's pretty simple to work with and uses heavy 3M bonding tape vs drilling holes in the side of the fiberglass.
EZE Gutters
I also had problems with the door leaking and used some extra I had inside the top of the door to make a channel. I'll have a separate post about that coming up.
2) Clean out the window traps.
On these windows there is felt in the tracks. (that you can replace if you want to take the window apart and drill out the rivets. There's a guide on FiberglassRV site to do this. Also a PDF of that thread exists here.) There is also some drain holes. Mud and yuck tends to build up in these tracks. and can block the drain holes. So before you go tearing your window apart to replace or grabbing a sealant, clean out the tracks. You'd be amazed at how much that can do. There was so much gunk and bugs in my rear window track that the water caught in the track would backup through the felt and bubble up the inside track.
Here's how you should clean them. First pull up the seal. Go ahead and pull it all the way out. You'll want to clean it out/off. I thought about replacing it but haven't found replacement yet. Now get some tools and get in there and clean out that track where the seal sat. You may find dirt, grime, and all sorts of yuck. You may find a small flat head screw driver and an old toothbrush helpful here. Some silicone spray will help. Make sure the drain holes are clear too. Some folks have drilled them slightly larger to allow for the water to flow out faster.
3) Finally, you may want to replace the weatherstripping (it's gets old and cracked and dries out) that holds the windows in place. Most of the fiberglass campers have clamp ring style windows that I think seal better by clamping to the fiberglass. The Uhaul windows are different in that they sit inside a weather stripping seal that surrounds the hole in the fiberglass. I have not done this yet but I plan to and I will document what I do when I get around to it. My Uhaul came with one window busted out and a plexyglass piece in place. That's the worst leak I had to deal with was that window. I did get my hands on another Uhaul window (rare) and I'm planning to pull out the plexiglass and put in the new one. More to come on that when I get around to doing it....
For now I have no leaks. So I'm happy.
Subscribe to:
Posts (Atom)