Saturday, July 15, 2017

Epic Adventure 2: The Soloing Stride ... (Part 2 of 6)

(This is a continuation of a series of posts on our second long distance trip, see the first post if you want to start at the beginning.)

our Uhaul CT-13 Fiberglass camper at Steamtown USA National Historic ParkI titled this the Soloing Stride since I was going to spend the next several days with just Zelda (our dog) and I making our way north. I can typically drive longer and later when I'm by myself. I was going to be working during the days and driving a lot in late afternoon/evening.

I had planned to leave the DC campground late afternoon on Tuesday, so as to get an early start and use the evening to put some miles down. I was hoping that navigating traffic would get better as it got later until I could into some more rural areas. The plan was to head north around Baltimore and then head toward Harrisburg, PA inland. I was going to wind north on an inland route that would take me through a few states and end up in New Hampshire on Friday.

As I wound north toward Baltimore, traffic wasn't too bad except when I got to some of the interstate transition points where things tend to go down to one lane. (I never understand why they take 3 interstate lanes and compress them to 1 to merge into another multi-lane interstate.) I took the I-95 North to the I-695 around Baltimore and then joined up with the I-83 headed towards Harrisburg, PA. As I crossed into Pennsylvania, I pulled off at a rest stop to stretch my legs and walk the dog. The rest stop had a nice wooded area that was quiet for walking the dog. My dog doesn't like a lot of commotion around her when she's doing her business. So places where you can walk back away from the cars are the best for her. She is definitely not one of those dogs that will use a tiny green grass island in a parking lot. Can you blamer her though? I like my privacy too. A little further north I pulled off for gas and dinner and stumbled on a little donut shop called Maple Donuts with 58 choices. It was a fun distraction from the driving. After loading up on food and fuel, I hit the road for Harrisburg.

I passed through Harrisburg on the interstate around sunset. It was a beautiful site of the downtown sitting there on the side of the Susquehanna River. I connected with I-81 and headed northeast into the night climbing through some hills and ending up in Wilkes-Barre for the evening at a quiet Walmart parking lot. Zelda and I bedded down for the first of 3 nights on the road.

View from the machine shop looking out at Steamtown NHS
The next morning I drove the short distance to Scranton, PA. Yes, you'll know it as the home of Dunder Mifflin from the tv show The Office. It's also home to another site that was on my list to see: Steamtown National Historic site. Steamtown is sort of like the adult version of Thomas the Train. It's a working locomotive museum based in a roundhouse with an actual working turntable. I spent several hours working and doing meetings in the parking lot but found a break after lunch to venture in and explore. I happened to walk in at the time they were about to start a volunteer led behind the scenes tour and joined the group. The volunteer was extremely knowledgeable and I learned a lot that I didn't know about the different types of trains and how they function "under the hood."  The behind the scenes tour takes you into the shop where they still have guys who work on the trains to keep them running and are renovating other trains. You get to see all the equipment they use which is really neat. I think kids would have a great time here walking around looking at the trains, but they'd need to be middle school or older to really get the behind the scenes tour. Younger kids are not probably going to be able to hang with listening to an old guy talk for an hour. And once you go into the shop, you're stuck because of safety issues they can't let you just leave without walking everyone out. There are a lot of real tools and sharp objects and heavy equipment in the shop too. So best to avoid with little ones. For the adults though, it's a real treat!

Old Truck with a Moose in Vermont
From there I headed to Albany, NY on a pretty uneventful path winding from I-84 to I-87 (the first toll road I had hit on my route).  North of Albany I planned to stay in Troy, but the Walmart had signs stating no overnight parking so I drove on another 30 mins on NY Rt. 7 to Bennington, VT where I spent the night in a grocery store parking lot with a few other RVs.

The next day I found a truck stop on the 2 lane highway with good cell signal in the mountains and worked and did conference calls for a few hours. I took a break and decided to check out the local area a bit.

Bennington Battlefield in NY
On the NY side of the border near Bennington is a small town called Hoosick Falls, it has all the charm of small New England towns. And was decorated for the Fourth of July with American Flags like a lot of other small towns I had passed through. Hoosick Falls is also famous as the last place where Grandma Moses lived (and died). You can definitely see where some of her inspiration came from in and around the little town. (Drive down Main Street in Hoosick Falls.)

Northeast of Hoosick Falls as you wind toward the Vermont line again headed towards Bennington is the Bennington Battlefield State Historic Site. This provided a great opportunity for the history buff in me to check out a Revolutionary War battlefield. The battle, and park, happened just outside of Bennington in Walloomsac, NY. Part of the Saratoga campaign, the battle was a key component to the American's winning the battle of Saratoga. Around 2000 militia men under General John Stark routed the British force that was looking for supplies to bolster the army at Saratoga. Without those supplies, Burgoyne eventually suffered defeat. The great thing about battlefields is you get to mix some history with stretching your legs and walking your dog.

After a late lunch in Bennington, I drove out across the Green Mountain area of Vermont and wound my way into New Hampshire. As evening approached, I found a quiet truck stop on a 2 lane highway south of Concord, NH to spend the night. Tomorrow would be the big day for me to meet up with my family after a week on the road.

The story continues with Epic Adventure 2: Not where we're supposed to be (Part 3)

Tuesday, July 11, 2017

Epic Adventure 2: The Journey Begins... (Part 1 of 6)

Our U-haul CT-13 fiberglass camper and 2011 Kia Sorento loaded up to head out on our epic adventure.
Three years ago we took our camper out on what we called our first epic adventure. This time we were going farther and for longer. That previous ten day trip to South Dakota and back was the longest road trip we'd made since having kids. We had a blast and it proved to us that we could handle long road trips as a family with our little camper. As soon as we got home, we started discussing what other adventures we'd like to tackle. Life has been busy in the past few years. My wife has gone back to school and my job has changed and gotten busier. This summer we knew my wife had a break in her schedule and wasn't going to be taking classes. So we set it as the target for our next epic adventure with our family and little camper. Unlike my first epic adventure post, I'm going to split this one up in to multiple posts because an epic adventure deserves a bit more space. So sit back and I hope you enjoy the tale.

My wife grew up like a lot of young girls in 80s as a big fan of Anne of Green Gables. This love of the book and the movies, would make it her heart's desire to see the land of Anne some day: Prince Edward Island. This became a life long dream of hers that would hopefully come to fruition this summer if I could make it happen. I spent the spring planning routes and details for the trip and prepping the camper and our tow vehicle for it's longest voyage yet. This journey was going to be close to 4000 miles.

Painted white, U-haul CT-13 fiberglass camper.
We had wanted to get the camper painted since we got her but had never made it a priority. I decided in May to get her painted and cleaned up before the trip. I also did some other maintenance jobs on the camper like new tires/wheels and adding a second spare tire. I also spent some time really focusing on how I would pack for this trip. As we learned with our first long haul, when you have to use your camper to sleep in along the way to the destination, you can't store everything in it unless you want to shuffle stuff between the car and camper all the time. Some maintenance and modifications were done to our Kia Sorento (tow vehicle) also in preparation.

We had talked about this trip for many years and had roughed out ideas of how to make it happen. Since I work remote, I could work some of the trip but I didn't want to be buried in my work the entire time. So a plan developed in which I would solo with our dog and work/camp up toward Maine. My wife and the kids would fly up and meet me later. Flights to Manchester, New Hampshire were cheaper than Maine so we booked and planned for me to pick them up there. Then we would head off for Prince Edward Island and work our way home through Acadia and some New England states trying to visit some friends and family along the way.

On June 24th, I left out of our Georgia home and said good bye to the wife and kids. Zelda (our dog) and I were packed and ready to begin. I drove the first day to Apex, NC, where a cousin of mine had moved to and got to spend the night with their family. It been a few years since I'd seen them so was great to catch up. I arrived just in time for a gully washer that revealed a leak with the new window I had installed. So there was something else to fix when I had time.

On Sunday, I left Apex and headed for Washington, D.C. My corporate home office is located there and I thought I'd stop in for a couple days and check on the rest of my team at work. The driving was good, the weather was nice that day. I took the I295 bypass north around Richmond as it was supposed to be faster but I had to slow down due to the road being rough and causing a lot of trailer bounce. I hate the bounce of concrete roads; much prefer the smoothness of asphalt. It seemed like every bridge transition had a major dip which would cause a lot of bounce. So I'm not sure that I really saved much time due to having to drive slower.

U-haul CT-13 fiberglass camper at campsite in Cherry Hill Park.
Basically the site was all gravel under nice shady trees.
In DC, one of the closest campgrounds is the Cherry Hill Park. Technically, it's in College Park, MD. but it's near the I495 perimeter and I95 on the north side of DC. It's not far from the Greenbelt metro station so you can ride the metro into the city (which I always do when I fly in for work). Cherry Hill Park has a lot of amenities. They have a camp store, cafe, 2 pools, splash pad, hot tub, fishing pond, laundry rooms, movie theater and an exercise room. There are also several playgrounds for the little ones. All the sites are full hookup except for the tent only sites and Wifi and cable are included. Of course you are paying a premium for location and all these features. With my GoodSam discount it came to $63/night for a small shady back-in site. However, that's a lot cheaper than a hotel in DC I can tell you. It's less than half of what my hotel cost per night for my previous trip in March up there. The staff was very friendly. I had asked about late checkout option and they told me I could check out at 6pm for a half-day fee when I had originally booked my site. I called the office while I was there just to verify that they were still ok with me staying late. The lady told me yes. She then called me back a few minutes later because she forgot to mention the cost and wanted to make sure I was ok with that (which of course I was since they'd told me that originally).

our dog Zelda taking up one of the kids spots in the back seat for the first week of our trip.
Zelda got to ride in the kids seat for the
first week while it was just the 2 of us.
Enjoying her setup with the kids book box,
Doubles as water cup holder and dog food mat 
I ended up in site 1512. I had asked for a shady site and this site fit the bill. It was also extra wide compared to most of the other sites. Across from me were some tent only sites. I walked around the campground and it's huge. I can only guess they probably have over 100 sites. Some of the sites are definitely close together almost like a parking lot but they do have grass and a fair number of trees around the campground. There are 3 bath houses and the one that was closest to me was still a bit of a hike to get to. One nice touch is that they have street lanterns on the end of each row with a sidewalk path. So I didn't even feel like I needed to use my headlamp at night walking to the bathroom.

The weather was refreshing in D.C. The first night it got down to around 60F and a bit cooler the second night. Highs were low 80sF the first day and high 70sF the second. There was also a good breeze most of the time which made it feel amazing. The week before they'd been in the 90sF so I was happy the weather had shifted cooler for a bit. Having camped in Georgia in 90sF with no AC, I can tell you it's not fun.

Tuesday late afternoon after a full day of work and meetings, it was time to head on and put some miles between me and DC. I was adjusting my schedule to work in the mornings and drive in the late afternoon/evenings. I had till 4pm on Friday to make it to Manchester with no real solid plans in between other than some conference calls and meetings I was going to need to pull over and deal with along the way.

The adventure continues with Epic Adventure 2: The Soloing Stride (Part 2).


Monday, June 19, 2017

The Second Spare


new spare tire mount on Uhaul Camper CT-13 tongue
Previously, I had mounted a spare tire on the rear bumper. With planning for another long trip coming up, I decided I'd like to add a second spare to the tongue. I bought the same adapter I had used before. The question was, where to mount it as the tongue is a very busy place. Between the propane tank holder, jack, handle, and coupler, there's a lot already going on there. Then add the wiring and you have to make sure if you drill new holes somewhere that you're very careful where.

I opted to use existing holes. The coupler is attached with three .5 inch hex bolts and has the handle welded to the top of it. The tire mount comes with 4.5 inch long .5 hex bolts. These are the same size just longer. So I removed to rear two hex bolts from the coupler and attached mount there without having to drill new holes. I used the bottom holes because they are spaced perfectly and I wanted the tire to be high so no chance of it hitting the ground. I had to mount on drivers side due to the jack being on the passenger side. I also had to make sure because the bolts were long that they pointed the right direction so the tire could mount flat against the side of the tongue (didn't want them poking or rubbing a hole in the sidewall). The back plate that came with the tire mount wouldn't work as it was too thick and blocked the jack from swinging into place. So I got a kit at the auto parts store for hanging leaf springs and used a U-bolt from the back to add a little more support. I may keep my eyes open for a thinner back plate or try to make one in the future but for now it's secure.

back side view of new spare tire mount on tongue of Uhaul CT-13 camper

I think this will work out and was an easy mod. Having 2 spares on the trailer is a good insurance policy for the long hauls. I've also bought a bottle jack to keep in the trailer.

Wednesday, June 14, 2017

Lets Talk Hinges

Polar 402 hinges on U-haul Camper (CT-13)
Door sag. It's annoying to say the least, but it's also a sign of some other issues. So catching it early can save you some bigger repairs later. The door hinges on the U-Haul campers are Polar hinges. Same kind that are used on industrial freezers. The original hinges are model 402, but they don't make them anymore so you may have to grab model 412 if you do need a new hinge. The hinges are not cheap, right now I've seen them running around $30 something a piece. Most of the time the weak point isn't the hinge though since there made so durable. It's the screws, bolts and wood that they attach to that fails first.

Old bolt and nut from door hinge.
Out with the old.
Inside the camper you can find where the hinge bolts are as they're behind the little black 1 inch caps on the door and panel next to the door. Pop those caps out and you'll have access to the back end of the bots. The nuts on mine were rusted solid to the bolts, and they had worn out in the wood. So they were loose on the lower hinge (door side). I had to hacksaw mine off. I recommend replacing the nuts, bolts, and screws with stainless hardware. Stainless is more expensive but it doesn't rust. And trust me you don't want to have to replace these in a year cause you bought cheap hardware. Where the door hinges are, there is wood fiberglassed inside the door and wall to mount them too. Sometimes due to wear or a leak, this wood can start to rot. Depending on how much rot you have, you may be looking at a bigger job by having to replace those wood pieces. If you are lucky, like mine fortunately, you may catch it before a lot of damage. With mine, the lower hinge on the door side were seeing the 2 bolts wearing out and being loose. Also someone had previously put cheap screws into the screw holes which were rusting so I was going to change those at the same time.

New bolts and t-nuts for door hinges.
In with the new.
I used 10-24x2in stainless Oval machine bolts which matched up to what was there. Some folks have used flat washers and lock nuts. Due to wear I could tell the holes in the wood had worn out some and were a bit bigger than the 10-24 bolts. So I opted to go with t-nuts. The t-nuts are designed to dig into the wood and grip against it vs just being a bolt against a washer. I put the new hardware in after using the hacksaw to remove the old ones. I also removed the rusty screws and replaced with 10-24x1in stainless screws. My screws were a bit longer so that they could dig deeper into the wood than the original. This job can be easier if you have a friend willing to help. Then one of you can work from the inside and one from the outside. Also be careful backing out rusty screws as they can sometimes tear up the wood on their way out if they've rusted a lot. Take it slow and use a hand held screw driver not a drill.

Tip: When working with tiny bolts and the t-nuts in the tiny openings, you can't fit your fingers ( could only fit one) in there to thread the nuts on the bolts. So what I did was take another bolt and back screw it halfway into the t-bolt and then use that to help thread it on the bolt from the front. Once the front has gotten halfway threaded, I backed out the other bolt and tightened the front bolt down. I did use my finger to push the t-nuts against the wood and hold them while tightening.
back threaded t-nut
T-nut back threaded halfway with bolt to hold in place in hole while threading the regular bolt through the wall of the camper.

With the new hardware the hinges are again secure. Hopefully, I won't see any more bolts coming loose when I'm driving and the door will be more secure. All in all a quick maintenance job.

Thursday, June 8, 2017

Facelift

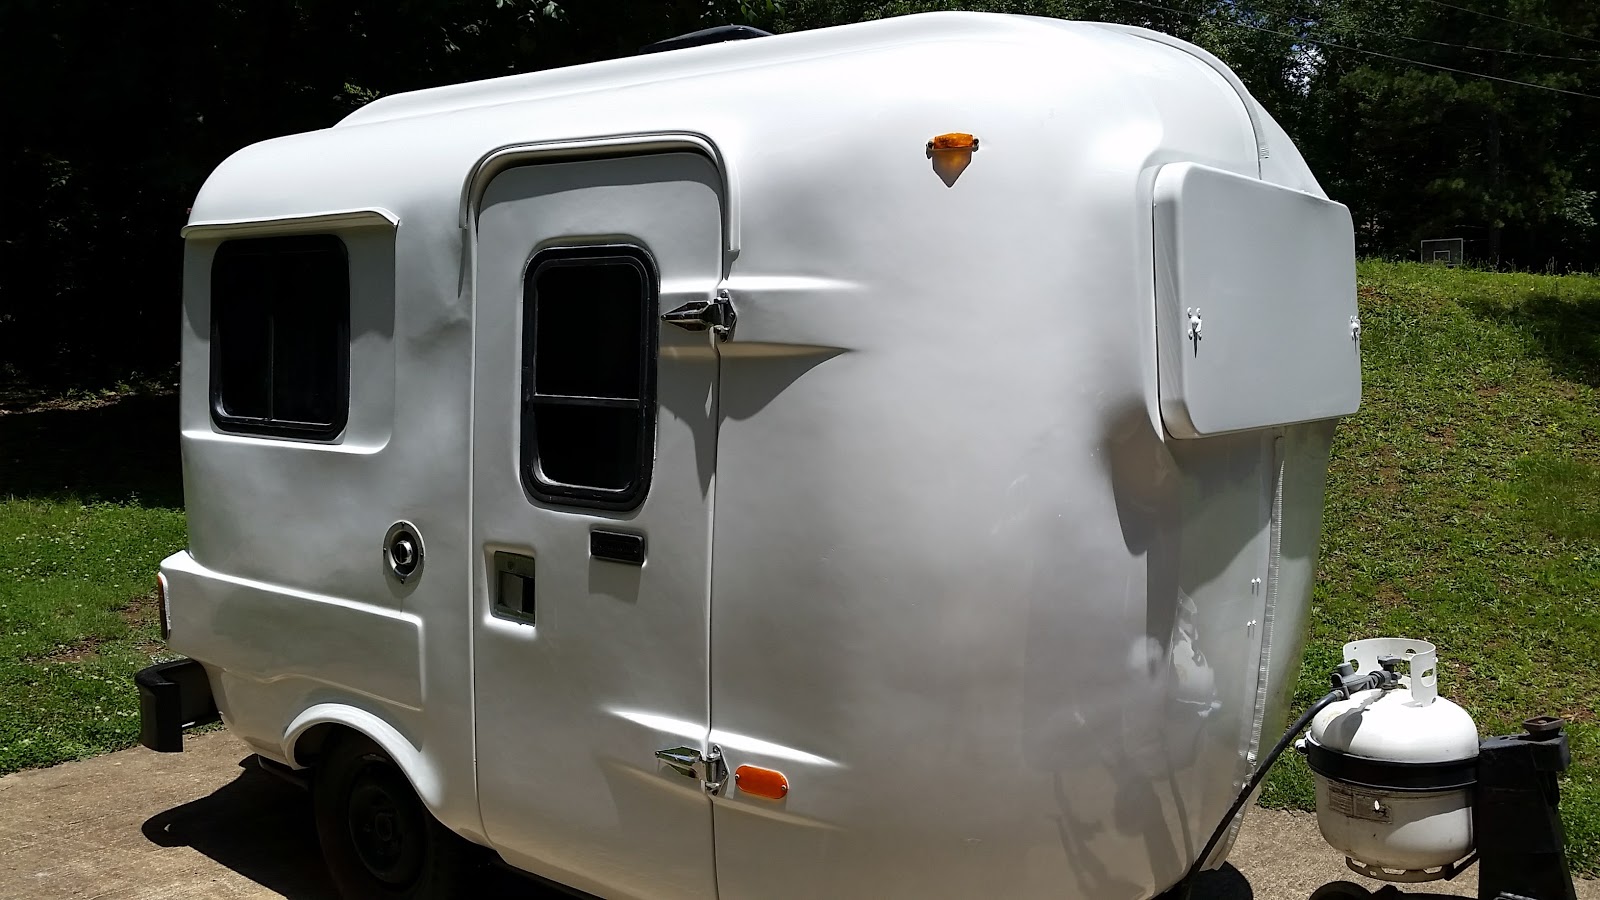
U-haul Fiberglass Camper with fresh paint
I got a good deal when I bought our little camper years ago, but it did need some work. I've gradually spent time and a little money over the years to upgrade and replace/fix things. Two things have been on my list for a long time: paint and replace the patched in plexiglass side window.


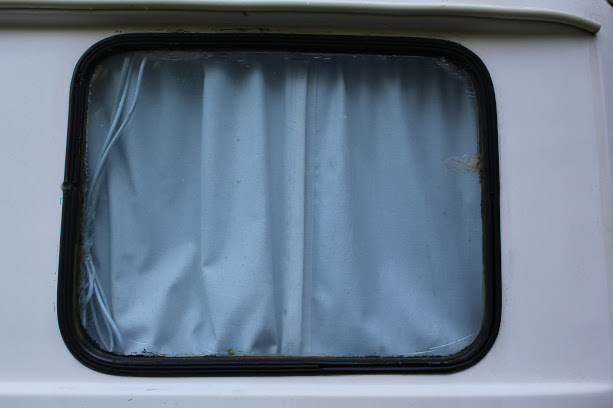
old plexiglass window
Old Plexiglass Window
New Old Stock Window
Someone had busted out the original side window in the past and of course hadn't saved the frame. Some previous owner had stuck a chipped and cracked scrap piece of plexiglass in there and then calked it up real ugly. Due to that, the window had no way to open to provide ventilation on that side. Several years back a company that specialized in selling surplus from warehouses, opened a crate they'd gotten their hands on. Inside were a bunch of windows with Uhaul stamped on them. Well they posted them for sale on their website. Didn't take long before a group of us stumbled on them and they were sold out in a couple days. NOS (New Old Stock) Uhaul windows for the campers that Uhaul had claimed they didn't have any for years. At some point they had a batch of replacements and had gotten rid of them I guess while cleaning out a warehouse. I talked to the folks at the company and they said they bought a bunch of stuff in crates from somewhere all site unseen. They had no idea what was in the crates till they opened them at their warehouse. And even then they didn't know what they went to. So with luck I landed 2 of them a right and left side. (I have the other as a spare in case one of them ever gets busted.) Well this week I finally got that installed by a window guy. Thrilled to have finally gotten around to it.


U-haul Fiberglass Camper before fresh paint
Before New Paint (but freshly cleaned)
U-haul Fiberglass Camper with fresh paint
After New Paint (Shiny!)
The one thing that is the most noticeable about the camper has always been the outside of course. Mine had lost most of it clearcoat and shine years ago and was mostly chalky and rough. It made it difficult to keep clean and when you did clean it, it was a chore. I had a couple of options: paint or wax. When adding layers of wax to the fiberglass campers,you have to use a lot of it. Most folks go with a ZEP floor wax and put on 5-6 layers. This gets it shiny but also leaves imperfections visible. You have to use barkeepers friend or similar product to really clean and whiten it. Mine ha a fiberglass patch that was visible and some discoloring due to water from rusty drain hole in rear window running down the back of it. With painting, the wife and I discussed what color for 2 years before we decided to keep it white. I took it to my bodyshop guy and he did her up nice with a new coat of paint in Super White. Now she's shiny and clean looking. He even painted the rock guard to match. It was a hard plastic with a rough finish to it and a bit yellowing. Now it's smooth and the same color as the camper. All in all, I'm happy we finally got her done up right. I feel the paint adds more to the value of the camper than just a wax job.

So with the facelift done, I'm turning my focus to some other tasks as I prepare for our next big adventure with her. More updates to come over the next month or two as we continue some work and find some time work in adventure.