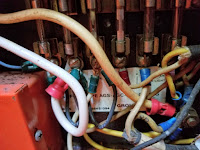
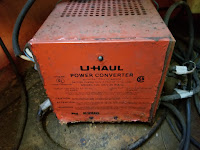
I really have to give credit to U-haul for making these things well so they just run and run. I bought a converter a few years ago to replace the original, but we didn't have any issues with the original so I just kept running with it. It finally died last year. The old converter had a fuse block built in using glass tube fuses. The old converter, being from early 1980s wasn't smart enough to adjust charging rates so as to not "cook" a battery if left plugged in. So I was specifically looking to upgrade that capability when I went looking for a new one. Based on my load calculations, I settled on the Progressive Dynamics PD9245C 45 amp converter. This converter differs from the original in that you have to get and wire in a separate fuse box. (Some folks have moved to a PD4045 which is more of an all in one solution but you need to cut an opening somewhere under the bed/table area to surface mount it.)
 |
| Fuse board inside the original Uhaul Converter |
Molded fiberglass campers, I've found, have a lot in common with boats. So when I started looking for 12v electrical components, I researched some 12v boat applications and suppliers. I settled on a 12 circuit fuse block with negative bus from Blue Sea Systems. This would give me enough room to expand beyond the original 6 circuits. I've used the 6 circuit block in the back of my Jeep for expanded needs along with Blue Sea 12v sockets and usb charging ports and have been satisfied with their equipment. I decided to move from the glass tube fuses to regular automotive spade fuses which is why I went with that specific block cause they're cheap and easy to find (and I carry spares for the car anyways). The negative bus is also a nice feature for the camper since most of the existing wiring is 2-wire. The original had a single connection point for all the grounds to connect to. The other major components I added were:
- an inline 80 amp fuse
- 2 distribution posts for connecting the heavier gauge wire to
- the PD92201 Remote Pendant for controlling the converter charge cycles manually if needed
- A digital battery capacity monitor LCD display
I built a small elevated platform to mount everything to and to help me organize it. The old converter was directly wired to the AC system and the new one came with a male plug. So I got a female plug from Lowes locally and wired it in to the existing original power line. The converter is connected to the distribution posts. Those in turn are connected to the fuse block and negative bus. The positive line has the 80 amp inline fuse for protection of the block. (Note the block is rated to 100 amps so I'm well below that rating.) I should never really be pulling anywhere close to that amount since I'm only using LED lights, Fantastic Fan, a few 12v charging ports, and the stove hood (I removed the original heater so that's not a load anymore). The battery will be connected to the distribution posts also (more to come on this). I put the pendant and capacity monitor in place of the old analog capacity monitor near the door.
I was able to install the new setup and hook up the original wiring without any issues. I have not hooked up the battery yet as I am planning to move it from inside to the tongue of the trailer. I also did not hook up the old solar panel and solar charge unit as I know that the original panel is not working anymore. I plan to look into solar in the future. I did run into one issue which was the GFCI outlet above the sink was bad and kept tripping. After taking it out and testing it on a single circuit by itself, I determined that I needed to replace it.
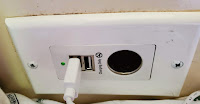
 While I was working on the 12v side of things, I also made a few more updates. I pulled out the old ash trays on either side of the main bed/table area and replaced them with a 4 port USB charging socket and a 12v socket/2 USB charging port socket and wired these into 2 of the extra points on the fuse block. I also did some lighting updates that I'll go into more detail on in another post.
I hope you find this helpful if you decide to dive into redoing electrical in your camper. Next on my list is to build onto the tongue to house the battery up front and wire it into the system. I'll post details on that once I get it completed.


